Running Technique – Body Position For Optimum Performance

Running Technique-Body-Position-For Optimum-Performance

When it comes to runners who clock miles and miles every week on a regular basis attention and care needs to be directed to how they run  so they don’t get put off training for stress fractures, ankle sprains, knee injuries, shin splints, Achilles problems, back pain, or anything else we runners face. Of course nothing is guaranteed, but the more you look at how you run the less injuries and time of training you will have to ensure.

I have the habit of giving you a lot, a lot of information, and very detailed. I do this because I hope you will take 20% of what you read. Sometimes even that 20% is better than nothing.

That being said let’s talk about how you position your body to enable you to glide over the terrain, rather than stomping. And we begin with…:

A. ALIGN

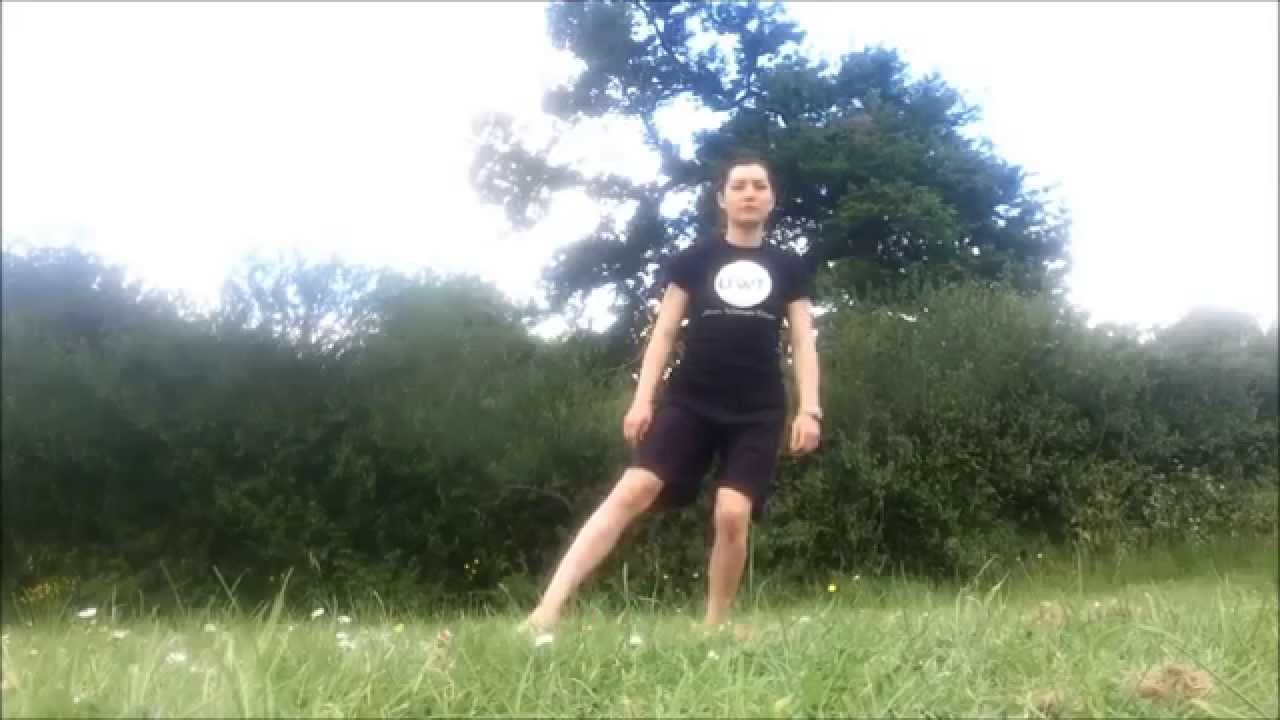
This is a good exercise to practice before you go for a run. It’s connects you to your own body. With practice you will gradually bring it into your run.

A good alignment means you are “stacking” the body in the correct position, and, if you manage to maintain that your run will feel amazing. Trust me, it will. When it clicks, it clicks.

The pressure on your joints will be at angles that don’t cause so much damage. Of course, it’s impossible to keep your body stiff in one position, but try as often as you remember to align and re-align. Also, remember, good alignment means a relaxed body, if you tense up you can do more harm. So relax and go through the exercise below.

  1. Stand with feet hip width apart
  2. Toes pointing forward
  3. Distribute your weight evenly on the left and right foot
  4. Distribute your weight evenly on the front (ball of food) and back (heel) of each foot left – keep the left/right weight distribution while doing so
  5. Soften your knees; don’t bend them too much, just lock them and then relax, you are not doing a squat
  6. Lightly tuck in your tailbone (this will also allow the knees to soften) so that, if your pelvis was a bucket of water, you wouldn’t spill water in any direction; your abdominal muscles should tense slightly and your lumbar spine should flatten slightly. These are signs you are probably in a good position. It should feel comfortable
  7. Your hip should be in line with the back of your knee cap, and in line with your ankles, roughtly
  8. Relax your shoulders and align them with your hips which is aligned with your ankles
  9. Chin parallel to the ground
  10. Head slightly pushed back until you feel the back of your neck lengthening, releasing tension and the natural curve flattening slightly
  11. Ears aligned with the shoulders

You can maintain this alignment at any angle. If you lean your body from your ankles everything is still aligned. If you lie on the floor your body is still in the same alignment. But if you stick your bum out, pull your head back or turn your toes out that’s when, in time, things start to go wrong and injuries begin to show up.


YouTube placeholder image
Accept marketing cookies to load content


B. ELONGATE

This is a simple imagination exercise, or visualization if you wish.

Holding the body in alignment as above, imagine a piece of string tied to the crown of your head and to the ceiling, a branch or the sky above you.

Imagine how this piece of string elongates your body towards the sky. Keeping its shape and alignment though

You can begin to elongate the ankles, the shins, up into the knees, through the thighs, to the hips.

Then elongate your trunk and ribs. You shouldn’t lean back, push your chest out, pull your shoulder blades together or do anything else. Just imagine. There’s no point lengthening the front of your body while tension and shortening the back by pulling your shoulders back.

Then relax your shoulders, keep the alignment, elongate your neck and head – take care not to tilt your head back here.

Then imagine the piece of string and your vertebrae like beads on a string. Allow each vertebra to pop up, away from the one below it, and then lightly stack up on top of each other. Go from the tailbone/coccyx all the way to the neck/cervical spine and up through the crown of your head towards the sky.

You can practice this as a stand alone meditation. It will help improve your posture as well as slowly making its way into your running posture and to a better performance.


C. LEAN

After you practice a good alignment while standing and in movement and elongate the body, the next step is to practice a slight lean. The lean should be from the ankles, as described in the POSE Method of Running, and, on a flat ground it’s a matter of millimeters.

Remember, the key is: lean should be from the ankles, not bending from the hips. You can work this out in front of a mirror.

One of the greatest mistakes I see is bending from the hips. This is very very common, so take care, especially when you run uphill. You can easily end up with low back pain and not even make it up that hill.

Some argue the lean is not the way to go. I argue it is for at least 3 reasons:

  1. For your feet to land under the hip, in alignment with the rest of the body, the hip should be slightly ahead…..which is achieved through that slight lean.
  2. Pushing off and active landing are actually very very strenous. When you land under the body, and you do this by leaning from the ankles, you can pick up the feet and control the landing.
  3. Free energy! That’s gravity. It’s so much easier to “fall” forward than to push your body forward over and over again. Let gravity take over! It saves a lot of energy and you end up running faster, as you pick up you feet faster, as a result of landing under the body and not ahead, as a result of that slight lean.

I found this exercise in Chi Running by Danny Dreyer, which is really easy to practice.

  1. Stand in front of a table, about hip height, about 2 feet away (you will adjust after)
  2. Align your body, like a column
  3. Elongate your body
  4. Lightly tens your abdominal muscles
  5. Now lean from the ankles until you can rest your hip, or pelvis, on the side of the table
  6. Keep the column straight though, even at an angle
  7. Hold the position

You will notice how much your abdominal muscles contribute to this position, as it should when you run. This lean is a lot more than what you normally need, but if you exaggerate the lean when you practice you will do it just right when you’re out there running.

Here is a video talking about the lean as well.
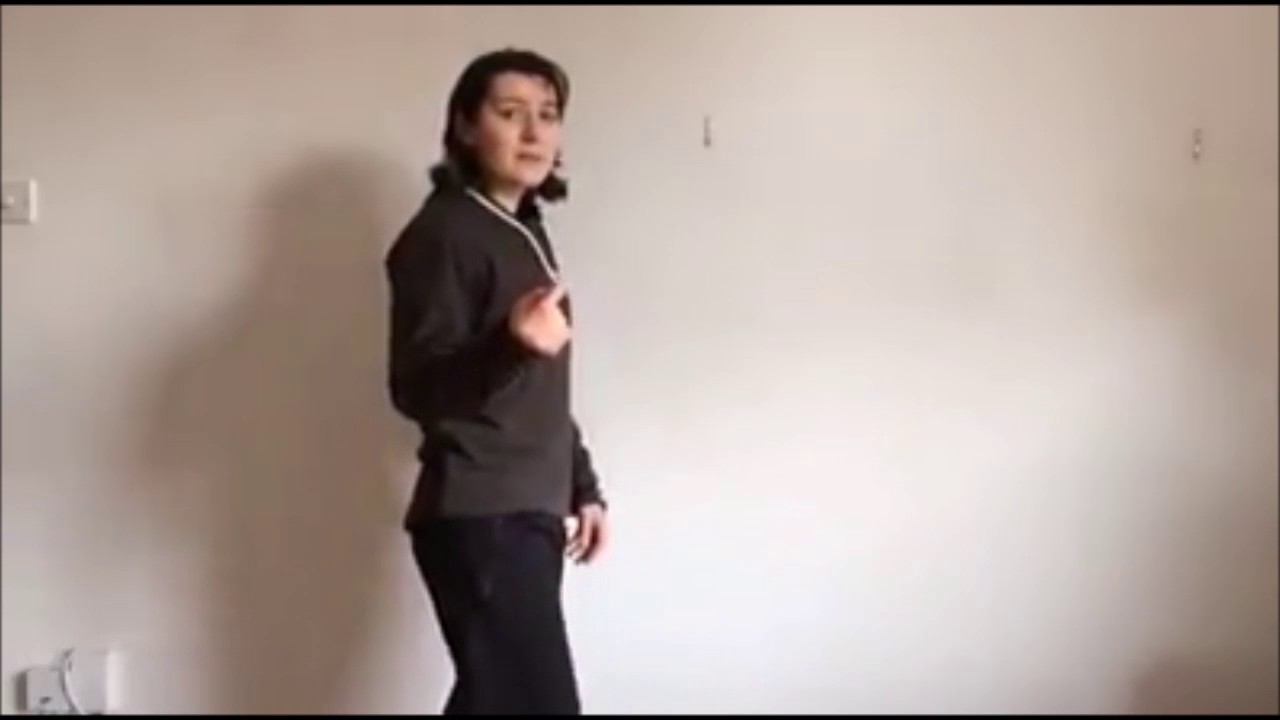
YouTube placeholder image
Accept marketing cookies to load content

That’s it for today. I wanted to write a short article but it ended up a pretty long one. Just take one exercise at a time. Print this page if you wish and practice each exercise for 1 week. You will transform your running.

Need help? I have a few ways to help you with this. One is a 4 weeks course where you go through ALL the running elements. This course can also be done in 2 weeks. Or, if you aren’t close by, I do have a series of coaching videos you can learn from, a running academy. Another option is online coaching. So there are solutions. Thus give a shout if you need help with this. If not, I’m looking forward to hearing how you implemented these exercises and how they worked out for you.

Running Technique – What Not To Do With Your Head When Running

running-technique-what-not-do-with-head

Your head weighs about 4 kg, give or take, with all the accessories (i.e. eyes, ears etc). So bobbing the head around is not a great idea for most people (Paula Radcliffe is a different story, it works for some people).

The point is that what you do with your head sends ripples down the body, all the way to the feet. This means the rest of the body has to adapt to what your head it doing. It’s a chain reaction.

Think about it this way, when you balance on a balance beam, if your head stays over your feet you are balanced. When you head goes left your whole body follows, you lost balance. If you manage to get your head back over your feet you might have a chance of re-gaining your balance.

But it’s more than that, it’s not about that kind of balance, that’s only an example, when you run your body has a different state of balance. When you run you “jump” from one foot to the other, you are on one foot at a time. Your muscles, joints, ligaments all have to activate and do their job to keep everything in one piece and going forwards. There are many elements of movement you have unaware of. And your head it an important part of this chain.

Bottom line, the idea is that your head should be nicely balanced at the top of your spine, with your neck relatively straight, don’t tilt your head backwards or forwards, left or right. Just straight.

Yeah but you need to look ahead!! You might think you need to lift your head to look forward or tilt it forwards (chin to chest) to look down. Actually the eyes are independent of the head, they can look up, forward and down without the help of the head. To a certain angle of course, after that head needs to move as well.

Most runners tilt their head backwards, so they can look ahead I suppose (I used to be one of them until recently), putting strain on the back of the neck and cervical vertebrae. Since this is a chain reaction, the tension and strain goes down through the body, ripple effect. While running there is a lot of vibration going through the body, neck and spine as it is, you don’t want your 4 kg pounding on top of your spine, do you?

That being said your head with never stay put, it has to have some movement of course. It’s a balancing act in fact. If you try to stop it you will only tense and strain your neck even more than if you don’t.

Try this when you walk to begin with:

  • keep chin parallel to the ground
  • back of neck straight
  • look forwards – eyes are independent of your head!

Actually, when you get the hang of it, having a straight neck releases that tension at the back of the neck, tension you are probably not aware of….until you straighten your neck. I know I do run faster and easier when I straighten my neck, it’s an instant shift, but you can’t tell you are tensed until you relax.

SUMMARY

DON’T

  1. Tilt head back
  2. Tilt head forward (chin in chest)
  3. Tilt head to the side
  4. Bob your head

DO

  1. Keep chin parallel to the ground
  2. Keep back of neck straight (there will be a natural curve in the spine of course)
  3. Use eyes independent of the head when possible (probably not on tough trail terrain, make sure you see where you step)
  4. Allow for the natural head movement

If you want to run lighter, faster and stronger get your head in the right place. And if you have any questions just leave a comment below.

In the meantime, keep developing your running skills.

Exercises To Strengthen Your Ankles

Exercises-To-Strengthen-Your-Ankles

As runners, especially trail runners, we must ensure our body is well prepared to negotiate with the wavy terrain, whether dry, muddy, wet or slippery.

Twisted ankles are very common and can put you off training. Indeed if you do your mileage off road your ankles – joints, muscles, tendons – will adapt and get stronger eventually. But what if you twist or sprain your ankle before they get strong enough?

I have to say I very seldom twist my ankles and I don’t remember ever spraining my ankles. The odd twist happens in obstacle course races where I run over tractor tires prints on dry ground or running through rivers over big, slippery rocks. And even then I recover fast.

Thus today I’d like to share with you how we, at The Merisoiu Technique Institute, train and condition our bodies, specifically ankles in this case, to be prepared for the unexpected on the trails.
 
1. Ride the terrain

Too often I see runners forcing themselves “into” the terrain instead of allowing the terrain to take them where it wants and then making small adjustments to keep moving in the desired direction.

Stop fighting the terrain, move with it, flow with it rather than going against it.

2. Strengthen your ankles 

The topic of this article. There are countless methods and exercises that help you to strengthen your ankles. Right now I will share with you a few simple ankle strengthening exercises which you can do not only as part of your scheduled training but anytime you wait in line, for a bus or brush your teeth.

a. Balance on one leg. That’s it, just stand on one leg. Please be aware of your surroundings so that if you lose your balance you don’t fall and injure yourself, have enough free space around you.

b. Balance with variations – The Clock. This means something like our very well known exercise The Clock in the video below. It’s excellent for ankle strength but also for strengthening stability muscles in the knees and hips and stabilising the hip joint, when done correctly. Here is a video with coaching tips.

Again please be aware of your surroundings so that if you lose your balance you don’t fall and injure yourself, have enough free space around you.


c. Balance with variations – 360 Degrees. Another slow movement balance exercise is the 350 Degrees. Again this will also strengthen stability muscles within other joints as well as the ankles.

YouTube placeholder image
Accept marketing cookies to load content

d.  Walk on tip toes. Classic but effective.

e. Walk barefoot on uneven terrain.

You should have guessed this was coming! Walking barefoot will activate dormant muscles in your feet and ankles which, in regular shoes, are so well supported they don’t do much work so they weaken. Take your shoes and socks off, go out in the garden, walk around and balance observing how your foot and ankles muscles move and twitch, they’re working out.

Any exercise you choose do them regularly to get results. You don’t need to spend hours doing this. It’s most effective when you do a little everyday over a long period of time. Balancing while brushing their teeth seems to be my clients’ favourite, just take care not to fall and injure yourself.

The Limping To Leaping 4 weeks is a course for runners who want to run with less effort and fewer injuries, it introduces you to the running mechanics of natural running technique. If you wish more information email alexandra@alexandramerisoiu.com or fill in this form and I will reply within 2 business days.

By they way, have you checked out Dracula’s Retreat?

Running Is NOT Only About The Legs

Running-Is-NOT-Only-About-The-Legs

Running is not just a leg movement, it’s a whole body movement and a skill to develop and improve continuously.

Take for example the simple movement of arms and legs. Here are a couple of exercises for you to test the connection between your upper and lower body.

Exercise 1

Walk as you normally would over a 50-100m distance if you can.

Now walk exaggerating the movement of your arms and shoulders only, again 50-100m. Everything else moves normally. What are your legs and hips doing? How do you feel? Are you in control of your movement?

Now walk exaggerating the movement of your legs and hips only. What are your arms and shoulders doing? How do you feel? Are you in total control of your body?

Now walk exaggerating the movement of your arms shoulders as well as your legs and hips. Walk faster, then slower, then faster and notice how your feet are moving and are positioned with each step, notice the level of control you may or may not have and your overall coordination.

Now hold your arms tied to your body and your hands to your thighs. As you walk move your shoulder and whole arm forward. But remember the arms and hands are tied to the legs, so the whole side of the body moves forward, each side at a time

How do you feel? Do you feel your body is moving efficiently? I’m not looking for a specific answer, although you can guess that should happen. I’m interested in your becoming aware of what’s happening to and with your body.


Exercise 2

Here’s another example: walk with your arms behind your back.

You will probably notice that your shoulders still want, and struggle to move your arms but the arms aren’t going anywhere. It’s a struggle, you have to put in more energy than usual. If you continue walking like this at your normal walking speed you’d feel tired, more than you’d normally feel.

Notice how much effort the legs have to make to move you forward, how your core muscles do extra work trying, in vain, to move your arms.

Now release your hands and arms and walk normal. How easy is that. It’s just right, natural.


Do the 2 exercises above while running as well, you will see a massive difference between when using your arms and shoulders and when you don’t. Replace “walk” with “run” in the instructions.


Your body moves the way it moves because it was designed to move like this, this is the most efficient way to move, with the whole body as Jack Heggie says in his book Running With The Whole Body.

Yet many runners hold their arms tight to the sides. You don’t have to strain your arms and shoulders but they do have to move in co-ordination with your legs and hips.

When you move in co-ordination there is a spiralling motion in your spine. Certain muscles contract  storing energy, while opposite muscles stretch and energy is released. You run faster, easier, and, most importantly, you reduce the risk of injuries because your body will begin to move like a well oiled machine, rather than pushing, pulling, struggling and straining.

However that doesn’t mean you have to move your upper body excessively. It’s enough to release tension in your shoulders and allow the arms to move like pendulums back and forth from your shoulders, as if you are hitting someone behind you.

Keep your body moving the correct way, keep your joints as healthy and strong as you can and run for as long as you want.

Explore and develop an effortless and injury-free running style in our fast-track 4 weeks course 1-2-1. You will have videos and material after the course to help you continue to develop your running style. Want to know more? Just contact us here.

Solving The Achilles Tendonitis

Solving-The-Achilles-Tendonitis

The Achilles tendon connects your calf muscles to the back of your heel. Achilles tendonitis is an overuse injury causing pain and inflammation, usually felt as a dull or sharp pain along the back of the Achilles tendon, usually closer to the heel.

Possible causes of Achilles tendonitis

1. Weak calf muscles
2. Excessive pronation
3. Excessive stress being transmitted through the tendon
4. Excessive power to begin a new stride – push off


Solving the problem

Fist of all, allow the injury to heal. Take a break form running, give it time to heal. There are strengthening exercises you can do to speed up healing, such as Hakan Alfredson’s heel drop, which I used to do a few years ago, when I could barely walk from Achilles tendonitis, and found very useful. Also avoid aggressive stretching. The tendon is injured, it doesn’t need more aggression.

Second, once you are back and ready to resume running observe HOW you run. It might be that the cause of your injury is in your form. You might be placing excessive stress through the tendon with every single step. This is very common and, if the cause is in your form, it can be eliminated.

Here’s what to look for:


1. Landing under the body

The muscles on the front of your legs are considered braking muscles (tibialis anterior – shin; quadriceps – thighs). Muscles on the back of the legs (gastrocnemius and soleus – calf; hamstrings – thigh) are considered propulsive muscles that work with the Achilles tendon (Natural Running – Danny Abshire).

Most runners absorb too much impact from breaking when they land ahead of their body and use too much muscle power to keep moving forward. This “power run” style leads to high impact, long strides and push off which puts the propulsive muscles under great stress.

By landing under the body or the GCM (general centre of mass) and landing lightly on the midfoot/forefoot, then allowing the heel to touch the ground lightly (without putting weight on), you are using the muscles and soft tissues in your foot, ankle, legs and knees (which should be flexed) as shock absorbers to reduce the destructive impact.

This is the first thing to change in your running. All the following bullet points usually take care of themselves once your landing is straight under the body.


2. Midfoot/forefoot landing

Modern running shoes allow us to land as heavily as we wish. We can’t feel anything, but the impact is there, the damage is happening with symptoms showing up months later.

If you were to take your shoes off and run around a little you’d realise just how aggressive your run actually is. We do this sometimes on soft ground and clients are always shocked at how heavily they land. Without me saying anything their form slowly changes. Why? Because your body doesn’t like it so it will adapt. That doesn’t mean you have to give up regular running shoes, you can land with a midfoot/forefoot strike in any shoes.

Landing on your toes (high heels) or on your heels causes a lot of problems including damage to the Achilles tendon. What you are looking for is a light landing on the ball of the foot and then a light touch with the heel before going on to the next stride.


3. Flexed knees

Many runners land with a stiff leg and ankle, which means the muscles will not absorb the impact and so joints and tendons will suffer. Flex the knees and allow the ankles to bend and flex, don’t hold them stiff and don’t point your toes.


4. Pull, don’t push

When you begin a new stride try to pull the leg under your body rather than pushing your whole weight forward. It’s much easier to pull the leg than push the body. Makes sense? After this a slight lean from the ankles, with a straight, aligned body, will move you forward. It’s light and almost effortless. Here’s a video on how to pick up and pull your feet off the ground.


If you are a long distance, experienced runner you might find that getting these elements into your running form will slow you down and make you feel tired. You’ll probably run less than usual. But the question is: how bad do you want to solve your problem? Addressing the cause of your pain is the only way to permanently get rid of it. Any treatment will last for a while but repeating the same movements what lead to the injury in the first place will cause the injury to recur. Mileage can increase back to your normal, but if your injuries keep coming back you will probably stop running for good.

If you are interested in exploring and developing an effortless and injury-free running style you have a few options including a fast-track 4 weeks course 1-2-1. You will have videos and material after the course to help you continue to develop your running style. If you are interested leave a comment below or contact us here.

Pick Up Your Feet And Run Faster

Have you ever thought about what your feet and legs are doing when you run or even walk? Do you lift your feet off the ground, bending your legs at the knee or do you just drag them just above the ground, shuffling, one after the other?

If you have noticed your running form then you have already changed the way you run. If you haven’t now it’s the time to do so.

Watch the video below for a more detailed explanation, but in summary the reasons you should pick up your feet instead of dragging or shuffling:

Reason #1: You will run faster

Your legs are like pendulums. And like any pendulum, a long pendulum will move slower, a shorter one will move faster.


Reason #2: You will run more relaxed, lighter on your feet

If you pick your feet without lifting and leading with the knees you will not use the quads as much, thus you run more relaxed and with less effort. The work is done by your hamstrings and only at the start of the lift, after that your hamstrings should relax.


Reason #3: Reduce the risk of injuries

First of all if you drag your feet chances are you will trip or slip at some point. Pick up your feet and you reduce those chances, a lot.

Second if you drag your feet chances are you are landing in ahead of your body (instead of underneath), actively landing (driving your feet forward), heel striking and landing with a stiff leg or ankle. All this, in time, may lead to shin splints, plantar fasciitis, achilles tendonitis and then knee pain and back pain. It’s a chain reaction in fact.

So stop shuffling your legs, dragging them behind you and pick them up and bend your knee.

Remember running is a skill of movement, and art. As with anything you want to create, it will be difficult and uncomfortable at the beginning but once you get the hang of it you won’t run anymore, you will glide.

Check out the video below with this particular technical element and also this article Running Technique – Elements Of Effortless Running – Lower Body:

YouTube placeholder image
Accept marketing cookies to load content

How To Choose Your Running Shoes

Did you ever need a check list whenever you bought your running shoes? Well this is it: your checklist for choosing your running shoes.


1. Buy your shoes at the end of the day

According to Jorgen Welsink from Marathon Lifestyle Now whom we’ve had the pleasure to interview advises we choose our running shoes at the end of the day. The reason for that is because at the end of the day your feet are slightly swollen, as they are after a while of running.


2. Shoe flexibility

When you walk barefoot your foot bends under the toes, at the ball of the foot. Your shoe must allow for that natural movement of the foot otherwise your muscles, tendons, ligaments (including those of the toes) will work extra hard, too hard.

To test this bend the shoe with your hands, if they bend easily they’re flexible, if you put some effort into it then they’re not very flexible enough. Take a few of the shelf and feel the difference.


3. Toe room

Ensure you have the space about the thickness of your thumb between your longest toe and the front of the shoe. You also want to make sure your toes and feet can spread do the side as they would if you were barefoot. Make sure your little toe is happy as well.


4. Heel to toe drop

Heel to toe drop or heel drop is essentially the thickness measurement in mm from the heel to the toe or how fat the heel is. The heel drop can go as high as 12mm and as low as zero – which is as close as you can get to barefoot with a shoe on.


5. Terrain and shoe sole

Depending on the type of terrain you run on you have different types of soles. For example Inov8 have a great range of off-road shoes. This is the brand I use for winter training and Obstacle Course Racing. I use VivoBarefoot for any other type of terrain and the other seasons.

On our Amazon store you can find a range of running shoes.


6. Minimalist or not?

The closer you are to the ground – the closer you are to a zero mm drop – the less supported your feet are, the more impact you will feel and, as a results of feeling the impact, the more likely you are to reducing it.

The closer you are to the ground the more your muscles work (in your feet, ankles, knees, glutes etc). Minimalist walking or running also reduces your stride length, over striding being one of the main reasons of running injuries.

Being close to the ground also enhances the connectivity or communication between the soles of the feet, which have about 200 000 nerve endings, and the brain. As a result the brain knows how to position your body in the most efficient way to reduce the risk of injury. If the communication is restricted then the brain cannot properly respond to the terrain changes under your feet.

This is well documented  and probably the best book to get this information from is Natural Running Technique by Danny Abshire.

I am an supporter of barefoot, however I do have a word of caution for you, our feet are not adapted to this lifestyle, our muscles, tendons, ligaments and skeletal system have not developed for a barefoot lifestyle unless you spend your childhood and adulthood barefoot most of the time. You can transition with care and discipline if you wish. The book mentioned above can help with that as well. Ignore the transition phase and you are on your way to potential injury.


I think I touched on the most important aspects of how to choose your running shoes. If I remember something else or if anyone has any questions or suggestions leave a comment below and I will update the article.

Check out our running shoes selection from Amazon to get an idea.

Ask any questions below.

Running Programmes With Jorgen Welsink

As runners, if we don’t have a coach, we need to know how to train ourselves to reach the goals we have set without burning out and injuring the body.

Jorgen Welsink studied Hollistic Health Coaching / Nutrition at The Institute For Integrative Nutrition and Orthomolecular (Top)Sport Coach & Personal Health Coach at LekkerPuurLeven.

As a running coach Jorgen explains how running training programmes for marathons should be planned. Get a pen and paper because there are a lot of important points to remember and slowly introduce into your training.

We also talk about different types of running technique to reduce the risk of injuries. We talk about heel strike running and natural running technique.

Jorgen also gives us gives us his advice on how to choose your running shoes for marathon training and when. Yes, there is an ideal time of the day to buy your running shoes.

In terms of recovery during training and after your marathon Jorgen shares with us his advice on nutrition, sleep and training for recovery.

In terms of nutrition we talked about how running gels work, carbohydrate loading and how to build a fat burning instead of a sugar burning body.

YouTube placeholder image
Accept marketing cookies to load content

Links mentioned in the video:

www.iherb.com

Celtic salt

Smoothie with pea protein


Make your own running gels

Pineapple-orange chia energy gel
Orange-Pineapple Chia Gel Nutrition DataIngredients:

1 oz chia seeds
1 medium seedless orange
8 oz pineapple
¾ cup brown rice syrup
½ oz dry fruit pectin
1 serving electrolyte mix (above)
Mix the chia seeds with ⅜ cup of water. Stir until the chia gels thoroughly, then set aside.

Peel the orange, removing as much of the pith as possible. Combine the orange and the pineapple, including the juice, in a blender or food processor. Blend until smooth.

Combine ½ cup of the fruit mash with the hydrated chia. It’s normal to have extra fruit mash (I had ¾ cup left over). You can freeze it until you need to make another batch of gel.

Stir in the brown rice syrup, then slowly add the pectin. Finally, stir in the electrolyte mix.

Put the mixture in a small saucepan. Bring to a rolling boil over low to medium heat, stirring constantly. Let the mixture boil for 1 minute, then remove it from the heat and pour it directly into a sterilized ½ pint mason jar for storage.


Running Technique – Elements Of Effortless Running – Lower Body

elements of effortless running-blog

Any books you read on running technique which has the potential to reduce the risk of injuries have a few common elements. Each technique or style of running (i.e. Chi Running, Pose Method, Natural Running) has its own particular elements that sets it aside from the others, however they all state that to run with less effort and fewer injuries a runner should:


1. Land with the foot underneath the body 

That means DO NOT land ahead of your body because you overstride, break your momentum and increase impact. When you overstride you also have to power up by re-engaging the back muscle chains to start a new stride. More effort, more muscle tension, more impact, higher risk of running injuries.

If you can see your feet when you run (by looking down with your eyes and head, not by bending your whole body) it’s a sign you are probably overstriding, landing heavily in front of your body.

Bouncing up and down too much can be another sign. Usually, if you land under your General Centre of Mass you won’t bounce, you will move smoothly, almost like gliding.

This will also help reduce the rotational forces in the joints which lead to overuse injuries in the ankles, knees, hips, spine.


2. Lean the body from the ankles

This is an up-right, slightly forward leaning from the ankles, correctly aligned posture. Let gravity do the work instead of using your muscle strength.

YouTube placeholder image
Accept marketing cookies to load content


3. Strike the ground with a midfoot strike

Another common element is the midfoot strike. If you land under your general centre of mass and use gravity to move forward there is no way you will do a heel strike. You will automatically go into a midfoot-forefoot strike.

That being said make sure you don’t run on your toes. You land on the balls of your feet and then allow the heels to touch the ground slightly. That’s it.

If, when you run, you listen closely you can tell whether you land with the ball of the foot. You will hear a “tap” and then you will feel the heel touching the ground. If you hear a “punding” that’s heavy landing and probably heel striking.

If you think about it pretty much all sports require a midfoot or forefoot body weight distribution: dancing, skiing, martial arts free sparring, even tennis. Look at the footwork in this tennis match, just the first 10 seconds.

YouTube placeholder image
Accept marketing cookies to load content


4. Pick up the feet

Your feet are like pendulums. A long pendulum will move slower, a shorter one will move faster. So stop shuffling your legs, dragging them behind you, instead pick them up and bend your knee. 

YouTube placeholder image
Accept marketing cookies to load content

5. Aim for optimum cadence 

Running cadence is measured by the number of strides per minute that each leg takes. The optimum running cadence is considered to be 85 to 90 strides per minute. 

If you do all of the above then you can maintain the optimum cadence.

However you have to build up gradually to this cadence if it’s not your normal. Then you keep that cadence all the time and use the lean and picking up your feet to move faster. In Chi Running you also increase the strides to increase speed. But you move faster because you lean more and relax your legs more not because you are using muscle power. You should not put effort to increase your strides, it will happen as you lean more. But first master the lean.

Running Performance And Acupuncture With Jani White

Running-Performance-And-Acupuncture-With-Jani White

The world is changing and one needs to be informed, to know the available options and to even try them out. Some may work for you while other may not, but exploring different therapies gives you the greatest chances to find the best that works for you, the one that will enhance your performance and enable you to reach your goals and beyond.

When we talk about a runner’s health we think of nutrition, strength and injury prevention. While all these are important, and I should know since I work with runners and injuries, there is a part of our bodies we seldom think about: the internal body, with its organs and hormones. This is part of a runner’s health as well and a very important one. This is one of the reasons I am talking to Jani today.

Jani is a highly experienced acupuncturist, she lectures internationally and nationally on her subjects.

We first talk about my personal experience with Jani’s treatment, when we worked on releasing tension and stress, feeling more grounded and calm.

She introduces us to acupuncture and then we talk about how it relates to runners and running performance. How it helps drive oxygenated blood to muscles for enhanced performance and faster recovery.

“Acupuncture affects what is happening within your body at a neurobiological level. The majority of our neurobiological function is autonomic” (autonomic: cannot consciously control).

“Acupuncture enhances and keys the autonomic system into its peak performance, streamlining your system into its peak ability, generating ultimate homeostasis” (homeostasis: the tendency towards a relatively stable equilibrium between all the systems).

She also briefly explains what meridian channels are and how each channel relates to an organ. We all know that, as runners and not only, it’s not enough to look after our quads and core, we need to take care of our organs as well. If the internal systems don’t function properly nothing else will.

We also talk about how your surrounding environment depletes your reserves and what you can do home, right now to protect your body.

YouTube placeholder image
Accept marketing cookies to load content

Jani’s morning alkalizing drink:

  • tsp raw honey
  • tsp cold press cranberry juice
  • tsp apple cider vinaigre
  • 6 drops of bee propolis


Links mentioned in the video:

Jani’s Website: www.acuhouse.co.uk
Greenopedie: www.greenopedia.com